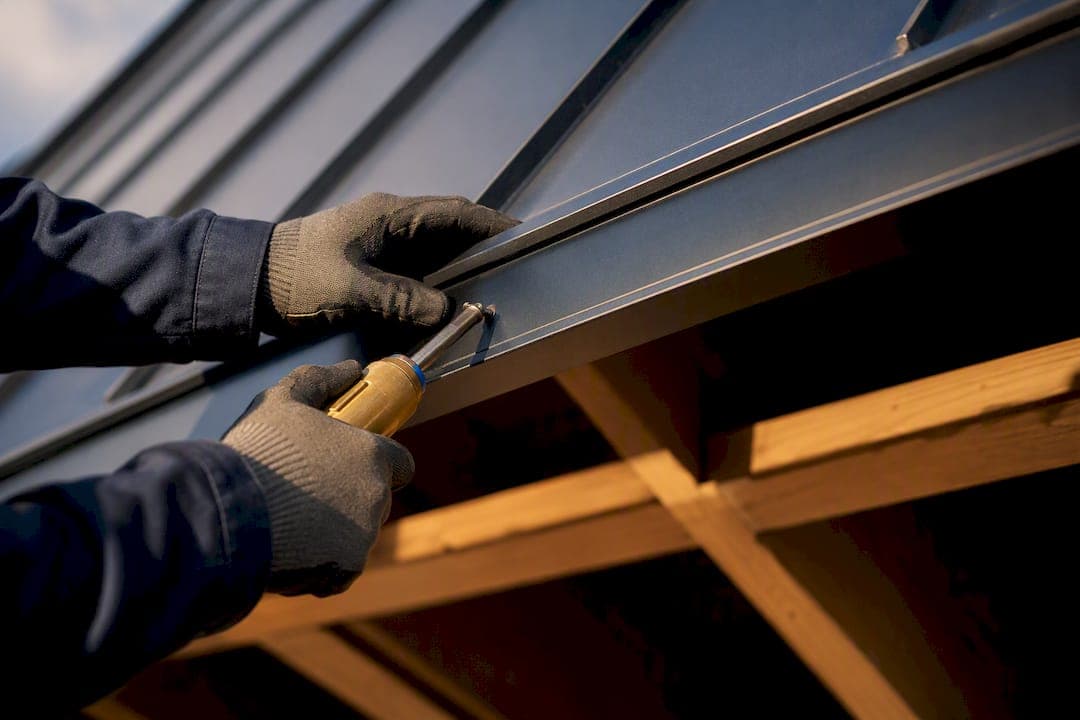
Yes, a metal roof needs a drip edge. Skipping it lets water wick back under the panels, rot the deck, and stain the fascia within a few seasons. The fix is straightforward: install a corrosion-resistant metal edge flashing matched to your panel profile, correctly sequenced with the underlayment, and if you’re not comfortable with the details, hire a roofer who fabricates edge metal for a living.
TL;DR:
- A drip edge prevents water from wicking under roof panels, protecting fascia and deck from long-term moisture damage, especially in coastal areas.
- Common profiles include Type C, D, F, and locking hem, with material options like aluminum, galvalume, steel, copper, and stainless steel, chosen based on panel type and environmental exposure.
- Proper sequencing involves installing the drip edge under the underlayment at the eave and over it at the rake, with precise overlaps and fastener placement to avoid leaks.
- Installation errors such as reversed sequencing, inadequate overlaps, or metal mismatches are frequent and can lead to premature roof failure, so careful inspection is essential.
- Cost-effective and durable installations often require expert fabrication, especially in high-wind or salt air regions, with warranties generally covering leakages when done correctly.
Table of Contents
- What Is a Drip Edge and Why Does It Matter on Metal Roofs?
- What Are the Common Drip Edge Profiles and Materials?
- What Codes and Standards Apply to Metal Roof Edges?
- How Should Drip Edge Be Installed and Sequenced?
- Step-by-Step Installation Checklist for Metal Roof Drip Edge
- What Installation Mistakes Should You Watch For?
- A Practical Take on Drip Edge for Metal Roofs
- Get Expert Help Specifying or Installing Metal Roof Edge Details
- Sources
- FAQ
What Is a Drip Edge and Why Does It Matter on Metal Roofs?
A drip edge is a formed metal flashing installed along the eaves and rakes that forces water to drop off the roof edge instead of curling back under the panel and wicking into the fascia or deck. On a metal roof, it does three specific jobs: it terminates the panel cleanly at the edge, it resists wind uplift at the vulnerable perimeter, and it directs runoff into the gutter instead of behind it.
Skipping the drip edge is one of the more common ways roofs fail early. Industry commentary notes that the small material savings from leaving it off almost never offset the cost of fascia and deck rot repair down the line.
- Prevents water wicking under panels at the most exposed edges of the roof
- Protects fascia boards and the roof deck from long-term moisture damage
- Keeps gutters functioning properly instead of overflowing behind the fascia
- Adds edge stiffness that helps panels resist wind lift
What Are the Common Drip Edge Profiles and Materials?
Profile names aren’t formal standards. They’re shorthand terms contractors use, and the terminology can shift slightly by region or manufacturer, according to industry material guides.
- Type C/L: An L-shaped profile, the most basic version, often used at rakes or on simpler retrofit jobs.
- Type D/T: A T-shaped profile with a longer vertical face, common on eaves where more coverage over the fascia is needed.
- Type F, or gutter apron: Extends further down the face to direct water squarely into the gutter trough rather than behind it.
- Locking drip edge with hem: Formed with a locking leg that grabs the panel’s hemmed edge, creating a tighter, largely fastener-free termination built for standing seam applications.
Material choice matters as much as profile. Typical options run from aluminum around .032 to .050 inches thick, galvalume in 22 to 24 gauge, 26 gauge steel, and copper or stainless steel for premium or coastal jobs, per common gauge references. Standing seam roofs generally pair best with locking profiles, corrugated panels do fine with standard C or D profiles, and shingle retrofits over an old roof deck often need a gutter apron to bridge the gap correctly.
What Codes and Standards Apply to Metal Roof Edges?
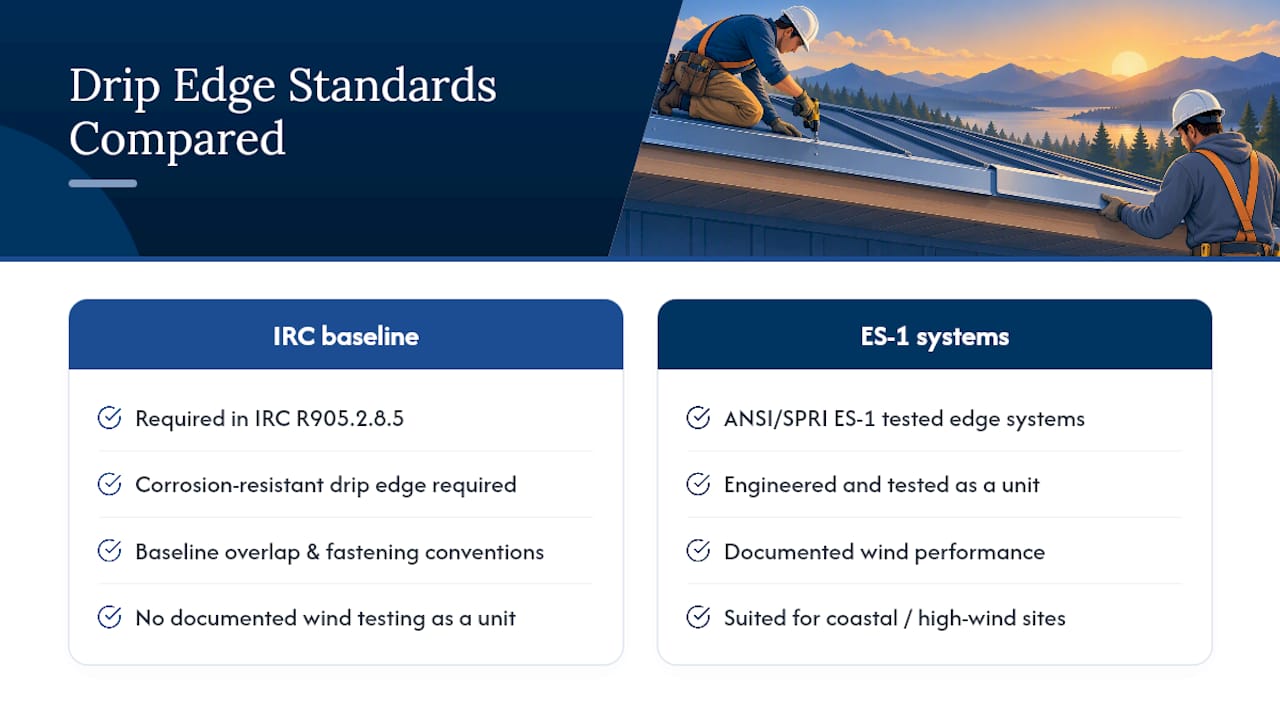
The International Residential Code, section R905.2.8.5, requires corrosion-resistant drip edge at eaves and rakes for many shingle roof assemblies, and it sets baseline overlap and fastening conventions that most metal roof installers follow even where the code language is written around shingles. Local jurisdictions sometimes amend or tighten these requirements, so it’s worth a quick call to the building department before finalizing a spec.
For coastal or high-wind sites, an ANSI/SPRI ES-1 tested edge system goes further than standard drip edge. These systems are engineered and tested as a unit, with documented wind performance, which matters for engineered edge requirements on commercial or exposed residential jobs. Always cross-check the roofing panel manufacturer’s own installation instructions too. They sometimes specify edge details the code doesn’t cover.
How Should Drip Edge Be Installed and Sequenced?
Sequencing differs at the eave versus the rake, and getting it backward is one of the most common install errors. At the eave, the drip edge goes down on the bare deck first, with the underlayment layered over it so water shedding off the underlayment still lands on top of the metal. At the rake, it’s reversed: underlayment goes down first, and the drip edge sits on top of it along the vertical edge.
- Fasten with corrosion-resistant nails or screws spaced at roughly 12 inches on center, following installation guidance built around this fastener pattern.
- Overlap adjacent sections by at least 2 inches to keep water from finding a seam.
- Leave about a quarter-inch gap between long straight lengths to absorb thermal expansion and contraction.
- Use continuous cleats and splice plates on metal panel systems to tie sections together without relying solely on exposed fasteners.
Pro Tip: On long eave runs, don’t butt drip edge sections tight against each other in summer heat. Metal expands, and a tight joint installed on a 95 degree day can buckle once temperatures drop.
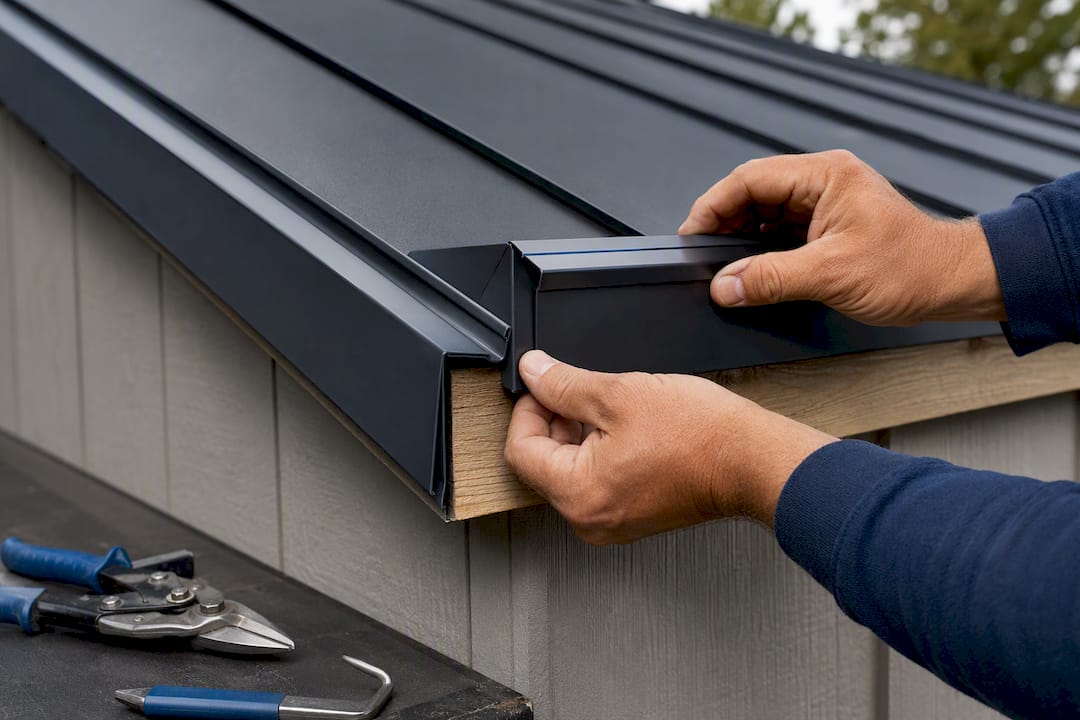
Miters and end caps finish the corners and gable ends cleanly, and on standing seam jobs, a factory-formed corner or hemmed locking edge avoids the field-cut gaps that show up when someone tries to bend a miter by hand on a ladder.
Step-by-Step Installation Checklist for Metal Roof Drip Edge
Before anything goes up, measure the full eave and rake perimeter, order the correct profile and gauge for the panel system, and plan out where miters, end caps, and splice joints will land. Build in that quarter-inch thermal gap at the planning stage, not as an afterthought once material is already cut.
Eave installation:
- Set continuous cleats along the eave line where the system calls for one.
- Fasten drip edge to the bare deck at roughly 12-inch spacing.
- Run underlayment over the drip edge, overlapping per the manufacturer’s minimum.
- Install the starter panel or first course so it terminates cleanly over the drip edge lip.
Rake installation:
- Run underlayment up the rake first.
- Lay drip edge over the underlayment, overlapping sections by at least 2 inches in the direction water flows.
- Set miters at the ridge and eave corners before fastening the final lengths.
Fasteners and material isolation:
- Use ring-shank nails or the fastener the manufacturer specifies. Both should resist corrosion.
- Isolate metal edge flashing from ACQ-treated lumber with a membrane or isolation tape. Dissimilar metals and treated wood cause galvanic corrosion over time, a point manufacturer guidance on coastal specs flags directly.
- Leave that quarter-inch expansion gap between long runs.
For standing seam panels, a locking drip edge with a formed hem gives the cleanest termination, since the panel hem locks into the edge metal instead of relying on face fasteners. Pre-punched cleats and shop-fabricated corners, available from several manufacturers, speed up install and reduce the fastener-spacing errors that happen with field-cut pieces.
What Installation Mistakes Should You Watch For?
The same handful of errors show up on failed jobs again and again: eave and rake sequencing reversed, overlaps under 2 inches, no thermal gap left between sections, mismatched metals causing corrosion at the fasteners, or exposed nails left to rust and back out over a few winters.
A quick inspection checklist catches most of it:
- Confirm overlap direction and length at every seam.
- Check fastener spacing stays consistent, without long unsupported gaps.
- Look for tight-butted joints with no room for expansion.
- Verify metal edge flashing is isolated from any ACQ-treated framing.
- Make sure miters and splice plates are secure, not just caulked over.
If an existing edge is missing a gutter apron, has short unsupported sections, or shows early rust at the fasteners, that’s a retrofit worth scheduling rather than patching. Persistent fascia staining or a soft roof deck at the edge usually means it’s past a simple fix and into inspection and repair territory.
A Practical Take on Drip Edge for Metal Roofs
Most drip edge failures aren’t really material failures. They’re sequencing and fastener mistakes made by installers rushing a detail that looks simple but isn’t. A locking hem profile on a standing seam roof is unforgiving of sloppy fabrication. Get the hem depth or the cleat spacing wrong, and the panel won’t seat right, no matter how good the metal is.
That’s why SW Metal Roofing fabricates its own panels, including an 18-inch snap-lock profile built specifically for coastal wind and salt exposure, rather than pulling standard stock off a shelf. Edge details on a coastal roof carry more risk than most homeowners realize. Salt air accelerates corrosion at exactly the fasteners and seams a rushed install leaves exposed. Every install of metal roofing completed by specialists can come with a lifetime leak-free warranty, and where solar is integrated into the same roof, it is often handled as one coordinated project rather than two separate contractors working around each other’s mistakes.
— Marcus
Get Expert Help Specifying or Installing Metal Roof Edge Details
Drip edge looks simple until you’re the one matching profile, gauge, and fastener spacing to a coastal standing seam roof, and getting the hem wrong on a locking edge means redoing the whole run. Custom panels and edge metal can be fabricated to spec for coastal wind and salt air conditions, and installations may come with lifetime leak-free warranties.
Whether you need a full standing seam metal roof installation, a metal roof replacement where the old edge details need to go too, or you’re adding solar and want one team handling both, the roofing provider may handle both fabrication and installation without subcontracting the work out. Request a quote through the cost and estimate page to get pricing specific to your roof and edge details.
Sources
- Roof drip edge: Types, Material and Code Guide
- Drip Edge Installation Guide (InspectApedia / Reelfoot PDF)
- DynaClad® Edge Drip Edge System (DMI Metals)
- Locking drip edge with hem (Cinnamon Metals)
FAQ
Does a Metal Roof Require a Drip Edge?
Yes. A drip edge is required or strongly recommended on virtually every metal roof, and the International Residential Code mandates corrosion-resistant edge flashing at eaves and rakes for many roof assemblies. Skipping it invites water intrusion at the fascia and deck within a few seasons.
What Type of Drip Edge Is Best for a Metal Roof?
For standing seam panels, a locking drip edge with a formed hem gives the tightest, most wind-resistant termination. In coastal or high-wind areas, an ES-1 tested edge system in a heavier gauge is worth the upgrade over standard stock.
How Do You Attach Drip Edge to a Metal Roof?
Fasten with corrosion-resistant nails or manufacturer-specified screws spaced roughly 12 inches on center, per installation guidance, overlapping adjacent sections by at least 2 inches. Install order matters: drip edge goes under the underlayment at the eave, but over the underlayment at the rake.
How Far Should a Metal Roof Overhang the Drip Edge?
The panel or roof deck should extend to meet the drip edge flush, with the drip edge itself extending past the fascia so water drops clear into the gutter rather than behind it. A gutter apron profile is often the better choice specifically because it’s formed to direct runoff into the gutter trough instead of just past the fascia edge.
How Much Does It Cost to Fix a Bad Drip Edge Install?
Costs vary by the extent of damage. Since a full metal roof replacement with correct edge detailing generally runs $40,000 to $60,000 depending on the project, catching a bad drip edge install early through a maintenance inspection is far cheaper than waiting for deck rot to force a bigger repair.