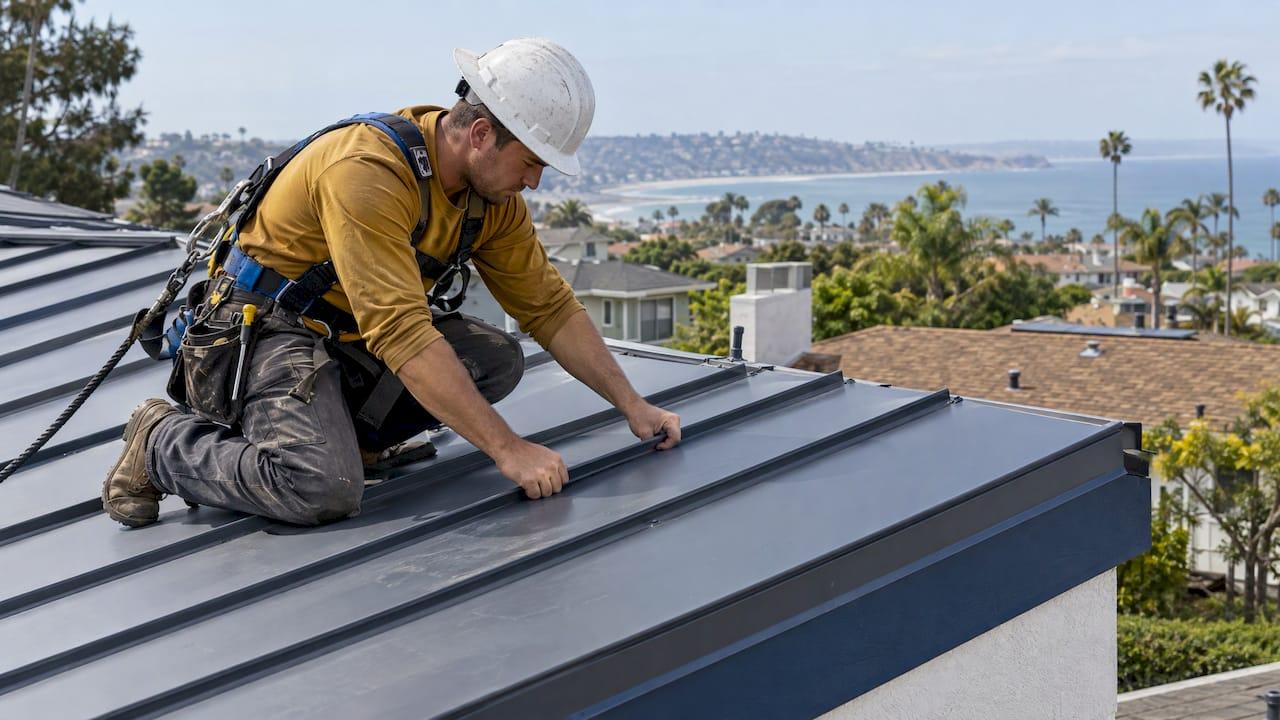
A snap-lock metal roof is a standing seam roof whose panels click together over hidden clips, so there is no exposed fastener on the surface and no seaming tool on the roof. It works well on a solid deck at a moderate or steeper pitch, and it is the profile we fabricate in-house as an 18-inch panel for San Diego’s coastal wind and salt air. This guide explains how the system goes together, what your roof needs for it, and what to settle before you sign, especially if solar is on your list.
TL;DR
- Snap-lock panels have a male leg fixed to the deck by concealed clips and a female leg that snaps over it, so no hand or mechanical seaming is needed.
- The usual requirements are a solid deck, underlayment and a minimum slope. Manufacturer approvals start at 2:12, and many recommend 3:12 or more.
- An 18-inch panel is the coverage width of one panel. The width changes the number of seams, the layout and the look.
- Solar can attach to the seams with non-penetrating clamps, but the clamp must match the exact seam profile and gauge.
- We fabricate our 18-inch snap-lock panels to custom specifications and install them with our own crews, backed by a lifetime leak-free warranty.
Table of Contents
- What a snap-lock metal roof is
- What “18-inch snap-lock panels” means
- Slope, deck and underlayment: what the roof needs first
- How snap-lock panels go on
- Wind, salt air and the coast
- Planning solar on a snap-lock roof
- Is snap-lock right for your building?
- What a snap-lock roof from us includes
- Our view on snap-lock roofing
- FAQ
- Sources
What a snap-lock metal roof is
Standing seam roofing comes in two main families. In a mechanically seamed system, a tool folds the two panel edges together on the roof. In a snap-lock system, the panel edges are roll-formed with a male leg and a female leg. The male leg is fastened to the roof deck with hidden clips. The next panel’s female leg is pressed over it and snaps into place. Manufacturer literature describes the profile as a concealed-fastener system that needs no hand or mechanical seaming during installation.

The result is the clean vertical lines people associate with standing seam. Because the clips sit under the panel, no screw heads show on the flat surface. That is the main reason homeowners choose a concealed-fastener roof. For a wider look at how those systems work, see our guide to hidden fastener metal roofs.
The parts of the system
- Panels: roll-formed steel (or other metals) with the male and female legs formed into the edges.
- Clips: small metal brackets fastened to the deck that hold the panel down while letting it sit cleanly on the roof.
- Underlayment: the water-resistant layer between the deck and the metal.
- Trim and flashing: eave, rake, ridge, valley and penetration details, which are where most roofs are won or lost.
What “18-inch snap-lock panels” means
The number refers to panel coverage: the width one panel covers once installed, measured seam to seam. Snap-lock profiles are made in several coverages. Published product data shows 12, 16, 18 and 20 inches, depending on the profile, with 16 and 18 inches the most common. An 18-inch panel is typically formed from a wider coil, because the legs and the flat of the panel use more material than the coverage width.

The seam height matters as much as the width. Many snap-lock profiles use a rib of about 1.75 inches, which gives a bold, defined shadow line. Steel gauge, the thickness of the metal, is usually 24 or 22 in these products, and lower numbers mean thicker metal.
Why the width matters to you:
- Look. Wider panels mean fewer seams across the roof, a calmer look on large planes.
- Layout. Panels have to land evenly on hips, valleys and walls. A good installer plans the layout so you do not end up with a thin sliver panel at one edge. Our guide to standing seam panel width covers coverage, layout and fit in detail.
- Custom runs. Because we fabricate panels to your roof’s specifications, we cut them to the lengths and widths your roof needs rather than adapting your roof to a stock panel.
Our 18-inch snap-lock profile is a design we built specifically for coastal conditions, aimed at wind and salt air.
Slope, deck and underlayment: what the roof needs first
Snap-lock panels depend on the roof underneath. The requirements are not a matter of opinion, because manufacturers get their systems evaluated against building codes and publish the conditions.
Take one example. A Texas Department of Insurance product evaluation for an 18-inch maximum-width, 1-3/4 inch snap-lock panel in 24-gauge Galvalume steel sets these conditions:
- a minimum 15/32-inch plywood deck;
- a minimum 2:12 roof slope (2 inches of rise for every 12 inches of run);
- No. 30 Type II felt underlayment with 4-inch laps;
- clips spaced at a maximum of 24 inches on center, each fixed with two #10 by 1-inch pancake-head screws;
- no installation over an existing roof covering.
Other manufacturers set their own minimums, and many recommend 3:12 or steeper for snap-lock profiles. Treat the 3:12 figure as the safe planning number unless the specific panel’s approval says otherwise.
What this means in practice
- Solid deck. The roof is built up from clean, sound sheathing. If the deck has rot, gaps or old fastener damage, it is repaired before the panels go on.
- Tear-off. Because the approval above does not permit installation over an existing covering, a full replacement starts with removing the old roof.
- Know your pitch. Many San Diego homes have moderate pitches that suit snap-lock well. If part of your roof is nearly flat, such as a porch or addition, that section needs a different approach. Our guide to low slope metal roofing explains the options.
We look at pitch, deck condition and roof geometry before recommending a profile, so the system we propose is one your roof qualifies for.
How snap-lock panels go on
Homeowners do not need to install a roof, but understanding the sequence helps you judge a bid and a crew. A typical installation runs like this.
1. Deck prep and underlayment
The deck is inspected, repaired and covered with underlayment. This is where a roof gets its second line of defense against water, and it is where shortcuts hide until the first big storm. Our crews handle the deck work as part of the replacement, with no subcontracting.
2. Starter trim and layout
Eave and rake trim go on first. The first panel is then set square to the eave and ridge, because it becomes the baseline for every panel after it. A published installation guide stresses this point: a first panel that is slightly off compounds across the whole roof. Our own layout planning is done before panels are fabricated, which is one benefit of making panels to measure.
3. Clips and panels
Clips are fastened to the deck at the spacing the approval requires. The panel is set in place and pressed so the female leg snaps over the neighboring male leg. Fasteners sit under the panel, never through its face.
4. Trim, flashing and penetrations
Ridges, valleys, chimneys, vents and skylights all need custom flashing. These details are where leaks usually begin on any roof, which is why a leak-free warranty depends on craftsmanship rather than on the panel alone. We back all our work with a lifetime leak-free warranty.
5. Final walk-through
The crew checks seams, trim and fasteners, cleans up the site and walks the roof lines with you.
Wind, salt air and the coast
San Diego homes near the water deal with salt-laden air, wind and sun. A concealed-fastener standing seam roof helps in two ways. There are no exposed screws on the surface that could back out or corrode, and the panels are held along their length by clips rather than at scattered points. Our 18-inch snap-lock profile was designed for exactly these wind and salt-air conditions.
For a deeper look at the details that help a roof resist wind, including how fastening and edge detailing matter, read our homeowner guide to wind resistant roofing.
Published ratings give you a way to compare panels. Manufacturer data sheets for snap-lock profiles commonly list UL 580 wind uplift testing, UL 2218 Class 4 impact resistance for hail and a Class A fire rating. When you compare quotes, ask which ratings apply to the exact panel, gauge and deck assembly proposed, since ratings are tied to a tested assembly rather than to the roof type in general.
Maintenance is light. Rinse away salt and dust when you can, keep gutters and valleys clear of debris, and have the roof inspected periodically. We offer metal roof maintenance and inspections for homeowners and property managers who want a routine.
Planning solar on a snap-lock roof
A common worry is that mounting solar means drilling holes in a roof meant to have none. On standing seam roofs, panels are often mounted with clamps that grip the seam instead.
The details decide whether it works:
- Match the clamp to the seam. One manufacturer’s S-5-S seam clamp is designed for vertical snap-together profiles with 1.5-inch and 1.75-inch seam heights, and needs a finished seam at least 1 inch high. Its holding capacity ranges from about 300 to 4,000 pounds depending on load direction, seam profile, material and gauge. So the exact panel, seam and gauge must be identified and the load table checked.
- Look for listings. Another clamp, the AceClamp A2Nw, is UL 2703-listed for PV mounting and uses a push-pin design that does not pierce the panel. It is made for 3/4-inch to 1-inch nail-base or snap-lock profiles. That shows seam sizes differ, so clamps are not interchangeable.
- Sequence the work. If solar is added later, the roofer and solar installer need each other’s drawings. If the roof is replaced first, panels can be laid out with solar placement in mind.
This coordination is why we handle roofing and solar together, so you deal with one team. Read more in our article on standing seam metal roofs and solar in San Diego.
Is snap-lock right for your building?
| Your situation | What to consider |
|---|---|
| Single-family home with a moderate or steep pitch | Snap-lock is a strong fit. Confirm deck condition and pitch. |
| Coastal home | Ask for a panel built for wind and salt air, such as our 18-inch profile. |
| Home planning solar | Choose the seam profile with the clamp and load table in mind. |
| Multi-unit or commercial building | Roof sections, runs and drainage need planning. See commercial metal roofing. |
| Very low-slope areas | Use a system designed for low slope. See our low-slope guide above. |
| Contractor sourcing panels | Custom-fabricated lengths and widths reduce field cutting and waste. |
For an overview of all the profiles, our metal roof types page and standing seam metal roofing page compare the options.
What a snap-lock roof from us includes
We are a San Diego metal roofing specialist. We fabricate standing seam panels to custom specifications, including our 18-inch snap-lock profile for coastal conditions, and our crews install them directly, with no subcontracted installation. Solar panel integration is part of the same service, and every roof carries a lifetime leak-free warranty.
Our metal roof replacement is listed at $40,000 to $60,000 as a one-off project price. Standing seam steel, stone-coated steel and metal shingle options are on our cost page, and our projects gallery shows finished roofs.
If you are weighing a snap-lock roof, contact SW Metal Roofing and we will review your roof’s pitch, deck and solar plans with you.
Our view on snap-lock roofing
We build snap-lock roofs because the system rewards careful work. A clean concealed-fastener surface, panels cut to your roof, and trim details done by the same crew that laid the panels: that combination is what keeps water out on the coast.
The first decision we make with a homeowner is not color or width. It is whether the roof’s pitch and deck suit the profile, and how solar will attach later. Once those are settled, the 18-inch panel does what we designed it to do in San Diego’s wind and salt air.
We stand behind the result with a lifetime leak-free warranty, because we install every roof ourselves and know how it was built.
Marcus
FAQ
What is the difference between snap-lock and mechanically seamed standing seam?
In a snap-lock roof, the panel legs click together by hand over hidden clips. In a mechanically seamed roof, a seaming tool folds the panel edges together on the roof. Both are concealed-fastener standing seam systems. We recommend the profile after looking at your roof’s pitch, deck and exposure.
What roof pitch does a snap-lock metal roof need?
Approved assemblies start at a minimum 2:12 slope on a solid deck with underlayment, as in the Texas Department of Insurance evaluation above. Many manufacturers recommend 3:12 or steeper, so use 3:12 as the planning figure unless the specific panel’s approval says otherwise. We check your pitch before proposing a system.
Can I put solar panels on a snap-lock roof?
Yes, commonly with non-penetrating clamps that grip the seam. The clamp has to match the seam height and profile, and its load capacity depends on the panel gauge and material. We coordinate roofing and solar so the mounting is planned with the roof.
Is an 18-inch panel better than a 16-inch panel?
It is a different coverage width. An 18-inch panel gives fewer seams across the roof, while 16 inches gives a slightly tighter rhythm. Because we fabricate panels to custom specifications, we choose the width that lays out best on your roof.
Can a snap-lock roof go over my old roof?
Some approved assemblies do not permit installation over an existing roof covering. Our replacement work starts with the old roof and the deck beneath it.
Sources
- Texas Department of Insurance product evaluation RC-389, snap-lock panel over plywood deck
- Snap-lock profile description and installation method
- SnapMax installation technical guide
- S-5-S seam clamps for snap-together profiles
- AceClamp A2Nw non-penetrating solar mounting clamp